Author:

Learn how to set up, develop, secure, and test Bun CRUD app using Elysia.js, TypeScript, and MongoDB.

Bun is a brand-new JavaScript runtime developed by Jarred Sumner and an alternative to Node.js. It's promoted as a fast runtime that provides out-of-the-box TypeScript support, the use of native Node.js & NPM modules, as well as a more unified ecosystem of tools.
At the moment Bun is only supported on Unix OS. If you're a Windows user you can set up Bun on WSL:
In this blog, we'll use Elysia, the API framework for Bun (sort of like Express to Node.js). Although Elysia is inspired by Express, it brings interesting innovations to the formula, some of which I'll talk about in this article.

There are two ways to set up the Elysia project on your machine:
This approach revolves around you setting up the dependencies yourself, starting with initializing the Bun project:
> bun init -y

// then it prints the following
Done! A package.json file was saved in the current directory.
 + index.ts
 + .gitignore
 + tsconfig.json (for editor auto-complete)
 + README.md

To get started, run:
  bun run index.ts
Then install Elysia and all required dependencies:
> bun add elysia
> bun add bun-types -d // dev dependencies
Then you add scripts in the package.json file to run the project:
  "scripts": {
    "dev": "bun run --watch index.ts" // enables hot reload
  },
Then you can run the app using a script bun dev and proceed with creating your dream app.
You can skip all of these steps if you're a pre-baked template. This is how you set an Elysia from the template:
> bun create elysia my-app
Which should generate an Elysia app that is ready to use.
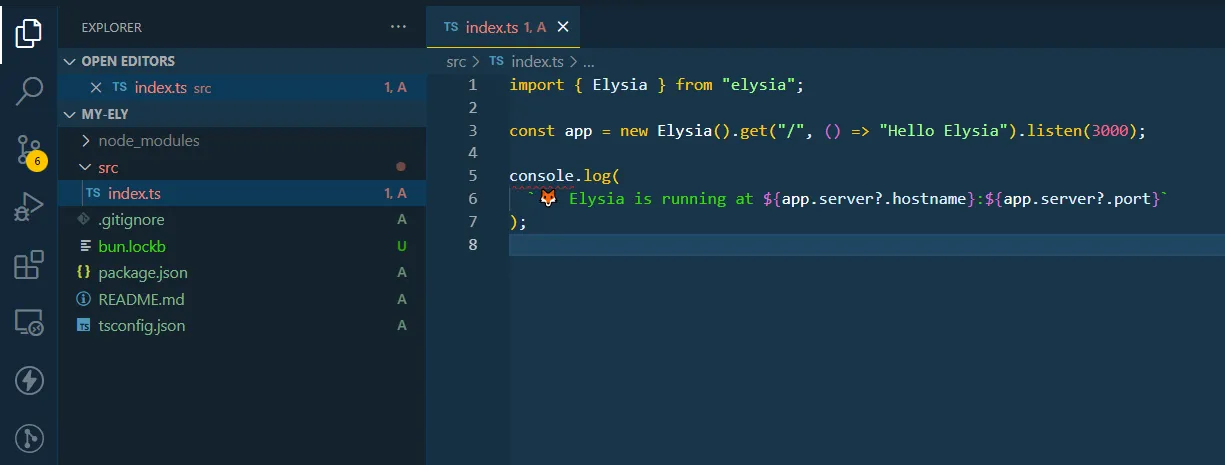 Elysia app generated using Bun template

Elysia.js syntax should be familiar to anyone who used Express.js before. Upon importing Elysia, you create an instance of it and assign it to a new variable (app).
import { Elysia, t } from 'elysia';
const app = new Elysia();
You'll use the app to set the route (endpoint) methods:
app.get(...)
Each endpoint is a function that contains at one two parameters: a URI path, followed by a callback function that may or may not contain a context handler parameter.
app.get('URI PATH', () => {
    // CALLBACK
 });
app.get('/', async () => {
    return 'Hello World'
 });
In the world of modern JavaScript, every endpoint is asynchronous by default. Should you feel the need you can prefix the handler callback function with the async keyword in order to use the await within the callback.
app.get('/', async () => {
    const users = await User.find({});
    return users;
 });
Just like in the Express.js app, you need to set a port that Elysia will use to launch a server.
const app = new Elysia();

app.get('/', async () => {
    return 'Hello World'
 });

app.listen(PORT, () => {
  console.log(`🦊 Elysia is running at ${app.server?.hostname}:${PORT}`);
});
The server setup is completed.,
If you visit the app on a specific port, e.g. localhost:3000,
you should see 'Hello World' displayed in the browser.
If you have several APIs that fall under the same category, e.g.:
app.get('/user/get', ...)
app.post('/user/create', ...)
app.put('/user/update', ...)
You can make use of groups to better organize them and avoid repeating yourself.
app.group('/user', app =>
  app.get('/get', ...)
  app.post('/create', ...)
  app.put('/update', ...)
)
Now every endpoint under this group (user) will have the same prefix.
If you'd like to split features into controllers you can do this. First, create a function that wraps routes in some file:
export const usersController = (app: Elysia) =>
  app.get('/users'...);
  app.post('/users'...)
Then export this function and inject it into the main router using the use middleware function.
  app.get('/', () => 'Hello Bun.js!')
  app.use(usersController)
Now you split routes per controller.
Bun has built-in support for reading environment variables through a .env file. Simply create a .env file in your project and let Bun handle the rest.
You can still use the good old process.env to read the environment variable:
// ...some Bun code
const PORT = process.env.PORT || 3000;

In Elysia you no longer have request and the response objects in the route. Instead, the two are merged into one Context Handler object that is used to read incoming data and send back a proper response.
app.get('/', (handler: Elysia.Handler) => {
  return 'Hello World'
});
You can access particular properties of the request:
You can add additional features to the request handler by using the decorate router function:
app.decorate('propertyName', variable)
Then in the callback, you can make use of the decorated value:
app.decorate('propertyName', variable)
app.get('/', (handler: Elysia.Handler) => {
  app.propertyName // ...
})
A common use case for this is to inject a database instance into your router so that all routes can access it without needing to re-instantiate.
To return the response to the client you simply use the return keyword built into the language. The route can return any type of response and it will set the correct content type automatically:
// String
app.get('/', (handler: Elysia.Handler) => {
  return 'Hello World!'
});

// Object
app.get('/', (handler: Elysia.Handler) => {
  return { message: 'Hello' }
});

// Array
app.get('/', (handler: Elysia.Handler) => {
  return [{ ... }]
});
You can even return HTML using a @elysiajs/htmlplugin (that you need to install).
But what about returning a custom status code? For this, you can use the set flag on the Context handler that will alter the response object sent to the client.
app.post('/', async (handler: Elysia.Handler) => {

  const data = 'some response'

  // Setting custom response headers
      handler.set.headers = {
        'X-Authorization': accessToken,
       };

  // Setting custom status code
       handler.set.status = 201;

  return data;
});
Now the response data will have a status code 201 and a custom header alongside the response text/object.
Alternatively, you can use the Response class that is built into JavaScript:
  return new Response("Your Message", {
    status: 418,
    headers: { ... }
  });
You can protect routes and validate incoming data using Guards.
 app.guard({
    body: t.Object({
      username: t.String(),
      email: t.String(),
      password: t.String()
    })
 // This route is protected by the Guard above
 }, (app: Elysia) =>

    app.post('/', async (handler: Elysia.Handler) => { ... })
Here, I'm validating the request body sent to this route to make sure that the consumer provides
all three required parameters.
If any of the conditions fails guard will throw a 400 Bad Request error.
Hooks are a special set of functions in Elysia that act like middlewares that fire in between the request and the response. You can create Hooks per route or for multiple routes.
These hooks can be used to validate the request before it reaches a certain route. For example, you can validate if a request body contains a desired header:
app.get('/', () => 'happy path data', {
    beforeHandle: (handler: Elysia.Handler) => {

        if(!ivalidateHeaders(headers)) {
            // not happy path
            set.status = 401
            return 'Unauthorized'
        }
    }
})
These hooks are used when you want to intercept the response sent from the route or handle the error.
For example, you can use the OnResponse hook to log all responses:
  app
    .onResponse((handler: Elysia.Handler) => {
       console.log(`Global Handler - Method: ${handler.request.method} | URL: ${handler.request.url} | Status Code: ${handler.set.status ||= 500}`)
  })
You can find the Error Handling hook in the repository linked below.
When applying hooks to multiple routes at once, don't forget that the hook needs to be called before the endpoint you want to apply it to:
app
  .use(hooksSetup)
  .get('/', () => 'Hello Bun.js!')
Read more about lifecycle Hooks in the docs.

You can extend the capabilities of your app using the plugins.
To document your APIs you can set up the Swagger using a plugin:
> bun add @elysiajs/swagger
Then in the project simply import and inject into a middleware:
import { swagger } from '@elysiajs/swagger';

  app
    .use(
      swagger({
        path: '/v1/swagger', // endpoint which swagger will appear on
        documentation: {
          info: {
            title: 'Bun.js CRUD app with Elysia.js',
            version: '1.0.0',
          },
        },
      })
  );
In order to cover your routes with Swagger you need to put the Swagger middleware above the routes you wish to document:
app
  .use(docsSetup) // <-- Swagger

  // routes below will appear in the Swagger
  .get('/', () => 'Hello Bun.js!')
  .group('/api', (app: Elysia) =>
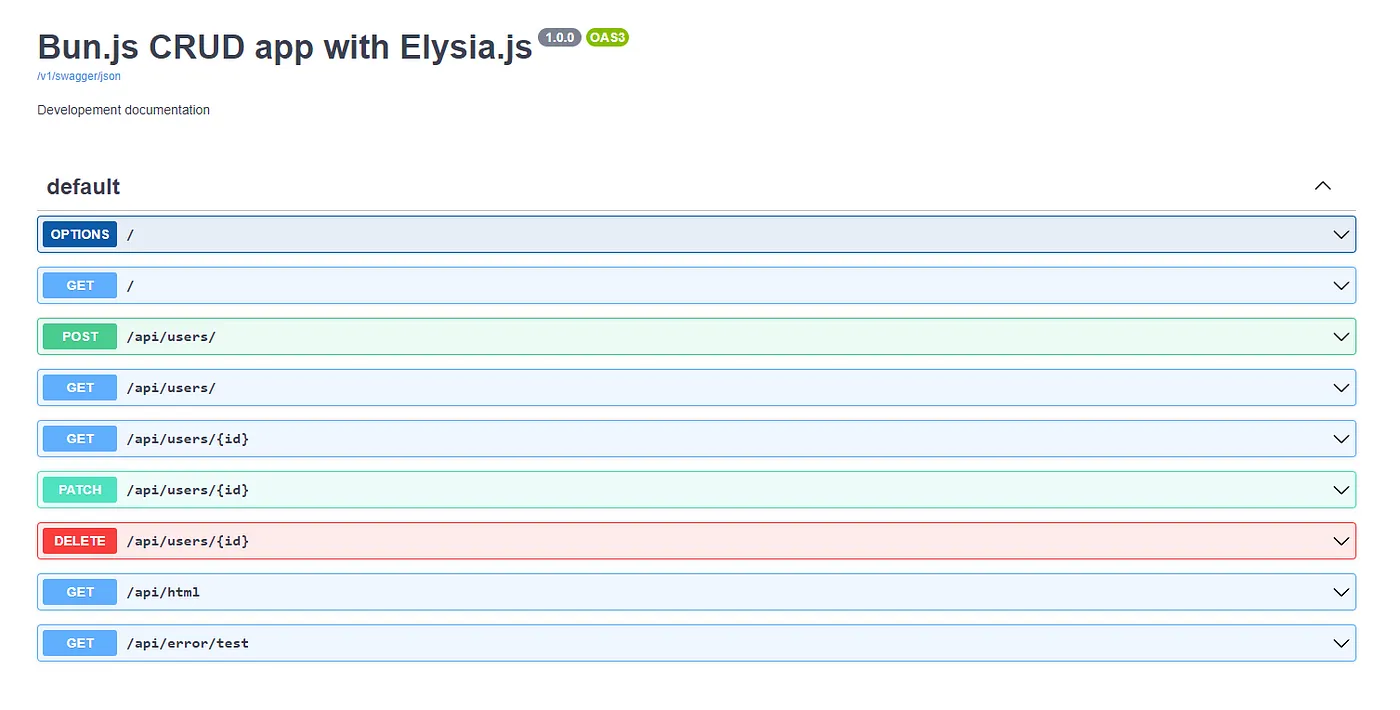 Swagger Preview
Elysia has a simple logging middleware that can just log requests to the console.
> bun add @grotto/logysia
import { logger } from '@grotto/logysia';

app
  .use(logger())
// will fire on any request below this line
To enable CORS in your Bun/Elysia app make sure to install the CORS plugin:
> bun add @elysiajs/cors
And then apply it to the project:
import { cors } from '@elysiajs/cors';

  app
    .use(cors(/* your options */))
You can use the Node.js Helmet library for security with Bun as well. Simply add it to the project:
> bun add elysia-helmet
Then import it into the router as a middleware.
import { cors } from '@elysiajs/cors';
import { helmet } from 'elysia-helmet';

  app
    .use(cors(/* your options */))
    .use(
      helmet({ /* your options */ })
    )
One of the common ways to secure apps is to use JSON Web Tokens. To enable JWT in Bun simply install it:
> bun add @elysiajs/jwt
Then add it to the project as a router middleware:
import { jwt } from '@elysiajs/jwt';

    app
      .use(
        jwt({
          name: 'jwt',
          secret: process.env.JWT_SECRET as string,
        })
      )
This basically extends your handler object with the JWT property.
This is how you access it later:
app.post('/', async (handler: Elysia.Handler) => {

  const accessToken = await handler.jwt.sign({
    /* Your Payload */
  });

});
Be sure to check out other plugins as well.

The best way to work with MongoDB is to use Mongoose, JavaScript ODM for Mongo. First, install Mongoose in the project:
> bun add mongoose
After the installation, create a directory in the src folder where you'll set up a MongoDB connection.
├── src
    ├── index.ts
    ├── database
        ├── db.setup.ts
I usually create a database for free on MongoDB Cloud. However, you can also run a local instance.
Once you're done with the setup, put the connection string in the .env file:
MONGODB_URI=mongodb+srv://<YOUR-CONNECTION-STRING>
Then use Mongoose to connect using the connection string:
import mongoose from 'mongoose';

// Connect to the MongoDB database
const mongoDBURI = process.env.MONGODB_URI ?? 'mongodb://localhost:27017';

mongoose.connect(mongoDBURI);
export default mongoose;
Finally, import this database setup file into the index.ts file:
import { Elysia } from 'elysia';
import './database/db.setup';

// ...
In order to work with the database data, you need to set up an entity model. Since MongoDB is a document database, the models are created as JSON schemas.
First, set up an interface that the schema will based on.
import { Document, Schema, model } from 'mongoose';

export interface IUser extends Document {
  username: string;
  email: string;
  password: string;
}
Second, create a User schema.
I added a couple of constraints for forcing a unique username & email, making each field mandatory, and omitting a password from the response.
const schema = new Schema<IUser>(
  {
    username: {
      type: String,
      required: true,
      unique: true,
    },
    email: {
      type: String,
      required: true,
      unique: true,
    },
    password: {
      type: String,
      required: true,
      select: false, // will not appear in the response
    },
  },
  {
    timestamps: true,
  }
);

export default model<IUser>('user', schema)
Now comes to CRUD part. You set up a controller that will interact with the database using the previously created User schema.
# Path to the Users Controller
├── src
    ├── index.ts
    ├── controllers
        ├── users.controller.ts
# CRUD API
import { Elysia, t } from 'elysia';
import User, { IUser } from '../entities/user.schema';
import { jwt } from '@elysiajs/jwt';

export const usersController = (app: Elysia) =>
  app.group('/users', (app: Elysia) =>
    app

      // Using JWT
      .use(
        jwt({
          name: 'jwt',
          secret: process.env.JWT_SECRET as string,
        })
      )

      // Validating required properties using Guard schema
      .guard({
        body: t.Object({
            username: t.String(),
            email: t.String(),
            password: t.String()
        })
      }, (app: Elysia) => app
          // This route is protected by the Guard above
          .post('/', async (handler: Elysia.Handler) => {
            try {

              const newUser = new User();
              newUser.username = handler.body.username;
              newUser.email = handler.body.email;
              newUser.password = handler.body.password;

              const savedUser = await newUser.save();

              // JWT payload is based off user id
              const accessToken = await handler.jwt.sign({
                userId: savedUser._id
              });

              // Returning JTW to the client (via headers)
              handler.set.headers = {
                'X-Authorization': accessToken,
              };
              handler.set.status = 201;

              return newUser;
            } catch (e: any) {
              // If unique mongoose constraint (for username or email) is violated
              if (e.name === 'MongoServerError' && e.code === 11000) {
                handler.set.status = 422;
                return {
                  message: 'Resource already exists!',
                  status: 422,
                };
              }

              handler.set.status = 500;
              return {
                message: 'Unable to save entry to the database!',
                status: 500,
              };
            }
          }, {
            onError(handler: Elysia.Handler) {
              console.log(`wwwwwww  Handler - Status Code: ${handler.set.status}`);
            }
          })

      )

      // Guard does not affect the following routes
      .get('/', async ({ set }: Elysia.Set) => {
        try {
          const users = await User.find({});
          return users;
        } catch (e: unknown) {
          set.status = 500;
          return {
            message: 'Unable to retrieve items from the database!',
            status: 500,
          };
        }
      })

      .get('/:id', async (handler: Elysia.Handler) => {
        try {
          const { id } = handler.params;

          const existingUser = await User.findById(id);

          if (!existingUser) {
            handler.set.status = 404;
            return {
              message: 'Requested resource was not found!',
              status: 404,
            };
          }

          return existingUser;
        } catch (e: unknown) {
          handler.set.status = 500;
          return {
            message: 'Unable to retrieve the resource!',
            status: 500,
          };
        }
      })

      .patch('/:id', async (handler: Elysia.Handler) => {
        try {
          const { id } = handler.params;

          const changes: Partial<IUser> = handler.body;

          const updatedUser = await User.findOneAndUpdate(
            { _id: id },
            { $set: { ...changes } },
            { new: true }
          );

          if (!updatedUser) {
            handler.set.status = 404;
            return {
              message: `User with id: ${id} was not found.`,
              status: 404,
            };
          }

          return updatedUser;
        } catch (e: unknown) {
          handler.set.status = 500;
          return {
            message: 'Unable to update resource!',
            status: 500,
          };
        }
      })

      .delete('/:id', async (handler: Elysia.Handler) => {
        try {
          const { id } = handler.params;

          const existingUser = await User.findById(id);

          if (!existingUser) {
            handler.set.status = 404;
            return {
              message: `User with id: ${id} was not found.`,
              status: 404,
            };
          }

          await User.findOneAndRemove({ _id: id });

          return {
            message: `Resource deleted successfully!`,
            status: 200,
          };
        } catch (e: unknown) {
          handler.set.status = 500;
          return {
            message: 'Unable to delete resource!',
            status: 500,
          };
        }
      })
  );
To put everything together, import the controller in the index.ts file and pass the reference to the controller into the middleware.
import { usersController } from './controllers/users.controller';

app

  .group('/api', (app: Elysia) =>
    app.use(usersController) // <-- Wiring up the dependencies
  )
The Users controller is ready to be used.

Another important factor of software development is testing. When testing you should not use the production data. Instead, tests rely on fakes, mocks, and stubs. The database is seeded with data you can play with, without harming the real data.
Bun provides a built-in test runner that you can use to test your functions and APIs.
I updated the database setup file to use the test database only in the testing environment (when NODE_ENV === 'test').
let mongoDBURI;

if (process.env.NODE_ENV === 'test') {
  mongoDBURI = process.env.TEST_MONGODB_URI ?? 'mongodb://localhost:27017';
} else {
  mongoDBURI = process.env.MONGODB_URI ?? 'mongodb://localhost:27017';
}

mongoose.connect(mongoDBURI);
Update the package.json file add a test hook among the scripts. The test hook will run bun test on any file that ends with .test.ts.
  "scripts": {
    "start": "bun src/index.ts",
    "dev": "bun run --watch src/index.ts",
    "test": "bun test ./test/**.test.ts" // <-- Test runner script
  },
I created a separate directory “test” in the project root that will contain all test files.
├── src
├── test // test files
    ├── users.test.ts
└── package.json
You can test each endpoint using the Request class and the Fetch API. First of all, you need to export the app object (instance of Elysia) in order to use it as a router within tests.
export const app = new Elysia();
Then within tests make use of the app and Fetch API to simulate API requests:
const baseUrl = `${app.server?.hostname}:${app.server?.port}/api/users`;

describe('GET Users suite', () => {

    it('should return a list of users successfully', async () => {
      const req = new Request(baseUrl);
      const res = await app.fetch(req);
      expect(res.status).toEqual(200);
    });

    it('should not return a user password', async () => {

      const userId = '64e87ae42400ef4b2cd1ae95';

      const req = new Request(`${baseUrl}/${userId}`);
      const res = await app.fetch(req);
      expect(res.status).toEqual(200);

      const responseBody = await res.json();
      expect(responseBody.password).toEqual(undefined);
    });

}

describe('CREATE Users suite', () => {

    it('should fail to create a user that already exists', async () => {

      const existingUser = {
        username: 'Jack31',
        email: '[email protected]',
        password: 'test123'
      }

      const expected = {
        message: 'Resource already exists!'
      };

      const req = new Request(baseUrl, {
        method: 'POST',
        headers: {
          'Content-Type': 'application/json'
        },
        body: JSON.stringify(existingUser)
      });

      const res = await app.fetch(req);
      expect(res.status).toEqual(422);

      const responseBody = await res.json();
      expect(responseBody.message).toEqual(expected.message);
    });

}
To run the test-runner, execute the test script in the package.json file:
> bun test

bun test v1.0.0 (822a00c4)
[0.09ms] ".env"

test/users.test.ts:
🦊 Elysia is running at localhost:3000
✓ USERS Test suite > GET Users suite > should return a list of users successfully [1015.90ms]
✓ USERS Test suite > GET Users suite > should return a user successfully using existing id [967.09ms]
✓ USERS Test suite > GET Users suite > should not return a user password [47.86ms]
✓ USERS Test suite > GET Users suite > should fail to return a user that does not exist [1.88ms]
✓ USERS Test suite > CREATE Users suite > should create a new user successfully [64.82ms]
✓ USERS Test suite > CREATE Users suite > should fail to create a user that already exists [53.65ms]
✓ USERS Test suite > CREATE Users suite > should fail to create a user when mandatory fields are not provided [6.28ms]
✓ USERS Test suite > PATCH Users suite > should update a user successfully [71.80ms]
✓ USERS Test suite > PATCH Users suite > should fail to update a user that does not exist [0.58ms]
✓ USERS Test suite > DELETE Users suite > should delete a user successfully [100.40ms]
✓ USERS Test suite > DELETE Users suite > should fail to delete a user that does not exist [0.80ms]
You can find the full test suite in the project GitHub repo.

Bun is fast and fun to work with, but still a bit buggy. For example:
But nothing really game-breaking or that can't be fixed by a patch.
I'll definitely keep an eye on Bun and I encourage you to give it a shot.
Feel free to clone the project and play around with it.
Author: